LogoLogo
  • A better way to do...stuff!
  • How we build the app
    • Overview
  • Documentation
    • Draftbit
      • Using Live Preview
      • Workspaces and Billing
      • Introduction to the Builder
      • Layout
      • Intro to Navigation
      • Fetching Data
      • Direct Integrations
      • FAQs
      • Draftbit
      • Draftbit
      • Custom Blocks
      • Borders, Background, and Elevation
      • Actions
      • Custom Screen Code
      • Exporting and Publishing Your Project
      • Sharing Your Project Online
      • Publishing Your App as a PWA
      • Stack Navigator
      • Tab Navigator
      • Draftbit
      • Draftbit
      • Basic
      • Media
      • REST Services & Endpoints
      • REST API Integrations
      • Themes & Styling
      • Submitting Data
      • Draftbit
      • Draftbit
    • Xano
      • resources-and-tips-1
        • 🎞️ Xano Video Tutorials
        • 🤝Community Corner
        • 💰Share Xano. Make money
      • FAQ
      • getting-started
        • ⚡ Jumpstart
        • 🎞️ The Xano Interface
      • instances
        • What is an Instance?
        • Early Access Instance
        • Upgrading an Instance
        • Sharing
        • Bandwidth Usage
        • API Rate Limit
      • What is a Workspace?
      • Dashboard
      • Database
      • Airtable Import
      • API
      • Library
      • Marketplace
      • Settings
      • authentication
        • Authentication
        • Sign-up & Log in
      • data-manipulation
        • The Function Stack
        • Addons (GraphQL-Like)
        • The Expression Builder
        • External Query Manipulation
        • Timestamp
        • Filters
        • Images
    • Expo
      • Creating your first build - Expo Documentation
    • Kommunicate
      • Installation
      • Installation
      • Installation
      • Installation
      • Installation
      • Flutter Installation
      • Installation
      • Zapier Integration
      • Authentication
      • CMS Installation
      • Authentication
      • Conversation
      • Conversation Assignment
      • Customization
      • Localization
      • Logout
      • Web Troubleshooting
      • Installation
      • Authentication
      • Push Notification
      • Conversation
      • Customization
      • Localization
      • Logout
      • Installation
      • Authentication
      • Push Notification
      • Conversation
      • Customization
    • Formito
      • basics
        • Getting Started
        • Variables
        • Are you GDPR ready?
        • How to prefill the values of my chatbot?
      • connect
        • How to connect Formito to Zapier?
      • convert
        • How to convert old formito chatbots to the new version?
        • How to convert Google Forms into a chatbot?
        • How to convert a Monday.com board to a chatbot?
        • How to create chatbot from QuickBase table?
      • guide
        • How to add my chatbot to WordPress?
        • How to create a chatbot for Zendesk?
      • shopify
        • How to embed my chatbot into a Shopify page?
        • How to display Formito chatbot on bottom corner of my Shopify store?
        • How to open my chatbot after clicking on links or buttons?
    • Stonly
  • Flex Stuff
    • App
    • APIs
    • Database
    • Website
    • Design
    • Style Guide
  • Content
    • Guides
    • ChatBots
    • Blogs
    • Whitepapers
  • Company
    • About us
    • Brand
    • Roadmap
    • Policies
  • Flex Together
    • Overview
    • Fair Finance
Powered by GitBook
On this page

Was this helpful?

  1. Documentation
  2. Draftbit

Workspaces and Billing

PreviousUsing Live PreviewNextIntroduction to the Builder

Last updated 4 years ago

Was this helpful?

In short, Workspaces lets you build apps collaboratively.

With Workspaces, you are able to invite team members to collaborate on apps together.

To create a Workspace, click the Create New Workspace button in the upper right corner of the Dashboard

As a Workspace owner, you can create apps by clicking Create New App and collaborators, and change .

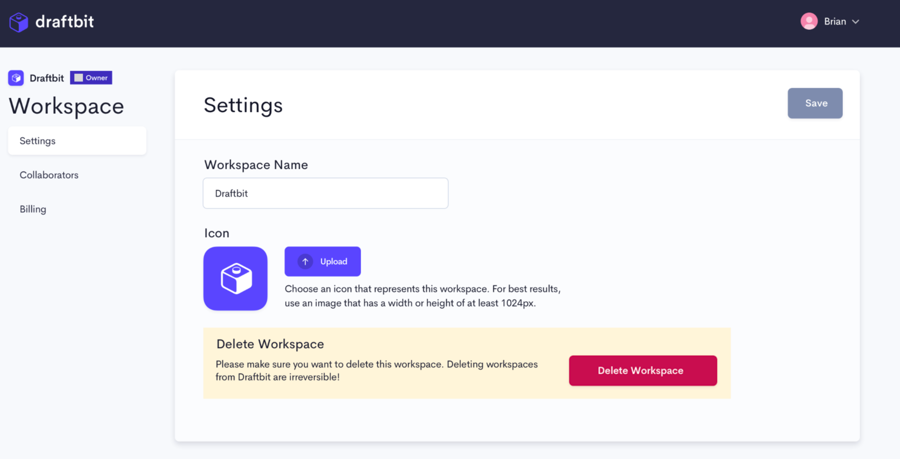
You can access Workspace Settings by clicking the gear icon on the right of your workspace's name.

Change the Workspace Name and Icon on this page. Additionally, you can permanently delete the entire workspace. After clicking Delete Workspace, you will be asked to confirm its deletion.

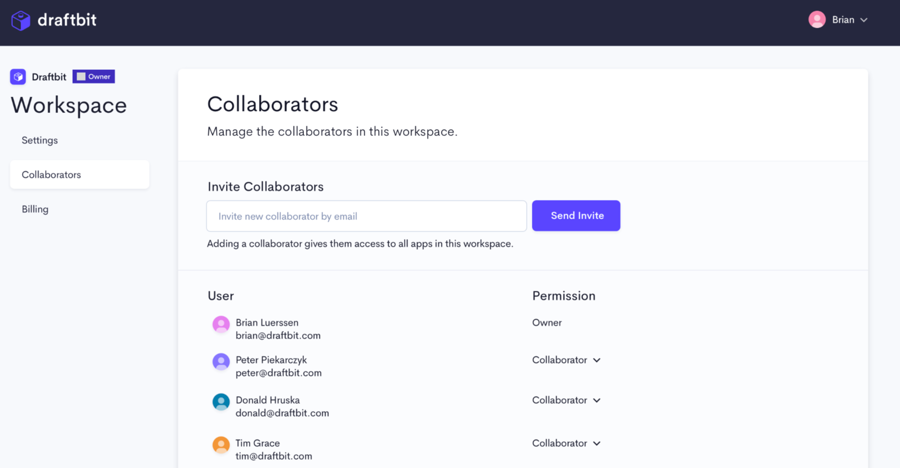
Invite new workspace collaborators and view the list of existing collaborators. To remove a collaborator, click the dropdown arrow and click Remove User.

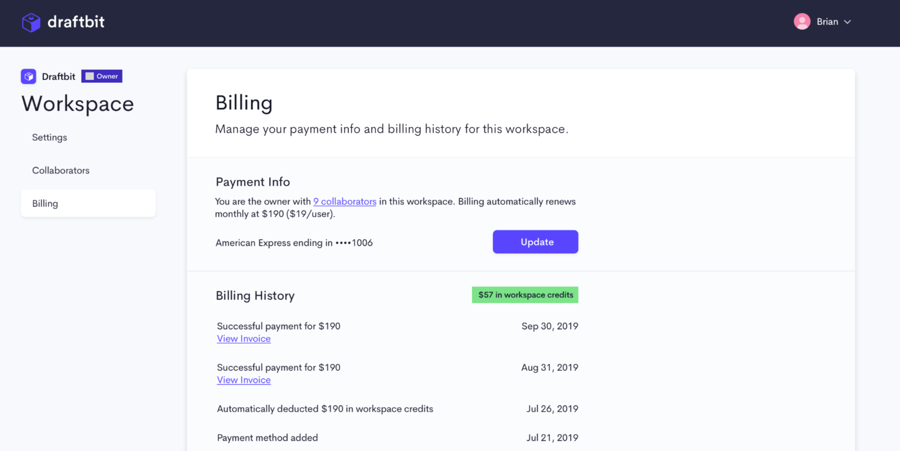
View your Billing History, available workspace credits, and update your payment method.

Click the Invite button on the top right of the Workspace you'd like to invite a Collaborator(s) to.

Once clicked, a modal will appear for you to enter the email of the teammate you'd like to add. You can also remove existing collaborators in this modal by clicking the dropdown arrow next to their name.

New collaborators will receive an email invitation to join your Workspace. Once they accept the invitation to join, their status will change from Invited to Collaborator in your Workspace.

Additionally, you can invite collaborators directly from the Settings page.

📘Please Note: You will be charged for each Collaborator you add to a workspace!

Updated 7 months ago

Table of Contents
Setting Up a Workspace
Workspace Settings
Settings
Collaborators
Billing
Inviting Collaborators
Invite
Workspace Settings