Introduction to the Builder
Last updated
Was this helpful?

Last updated
Was this helpful?
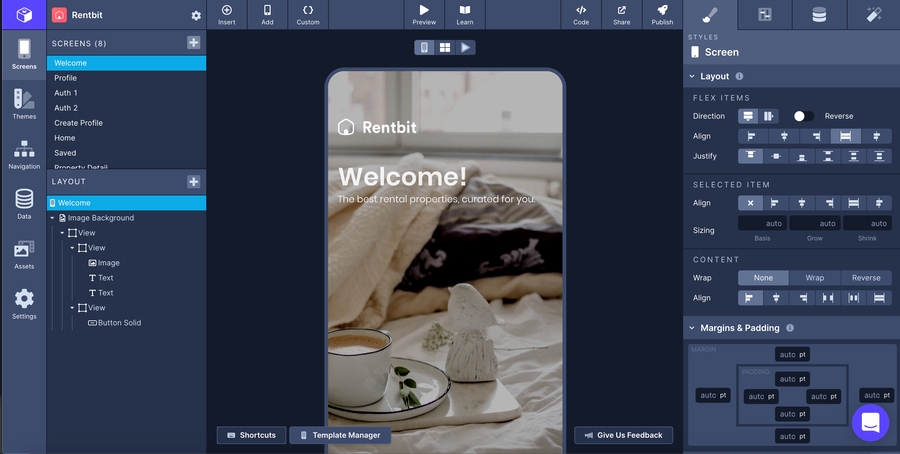
The Layer Tree (the left-hand side of the Builder) is where you are able to view all the components you've placed on a screen, rearrange them, and see their relationship with other elements.
To add components to the Layer Tree, click the '+' next to Layout to launch the component picker. In this menu you can click to add components to the Layer Tree.
Bits are what we consider to be primitives that include real React Native components and Draftbit components. These are essentially base-level components in our system that cannot be edited or changed.
Blocks are what we consider complex components or a collection of Bits that are capable of being updated or further customized. In the Blocks section you'll find we've provided a range of built-out components that require minimal configuration so you can get back to building.
To rearrange components, simply click the component in the Layer Tree, drag it and drop it where you would like it to go instead.
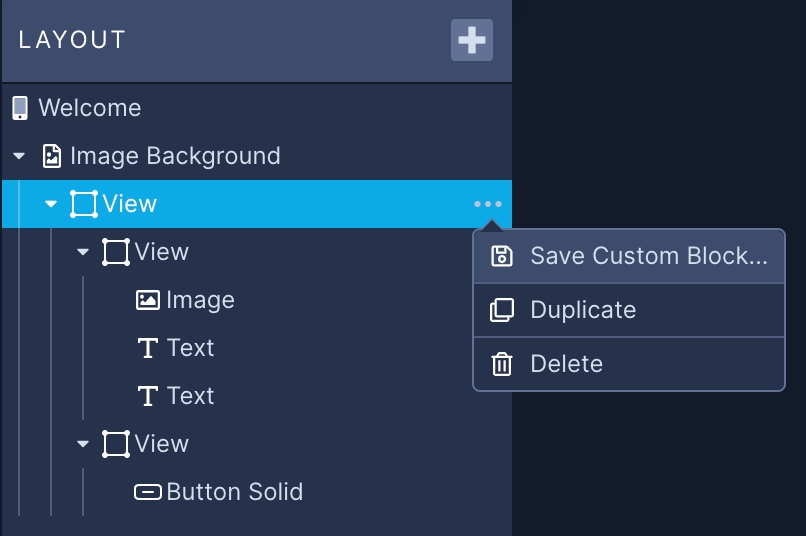
To delete a component, duplicate a component or create a , click the '...' next to the component name to launch a context menu.
Click the '+' next to Screens to open the menu that will allow you to add a blank screen or a screen from our Example Gallery to your app.
The Properties Panel (the right-hand side of the Builder, boxed in red) is composed of 4 different tabs. From left-to-right, these tabs are:
1. Styles Tab Where you'll configure and .
2. Properties Tab Where you'll configure the properties specific to each component. You can reference the component's documentation for specifics on configurable properties of each component.
3. Data Tab Where you'll configure components to in your app.
4. Interactions Tab Where you'll configure and
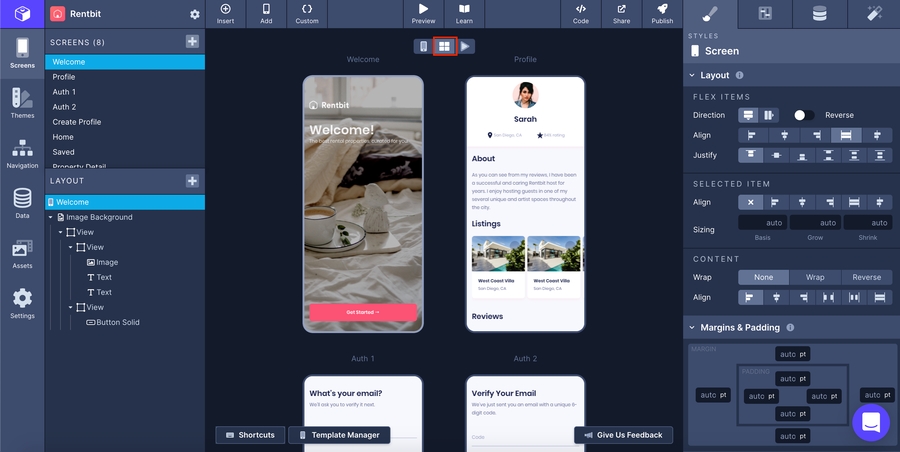
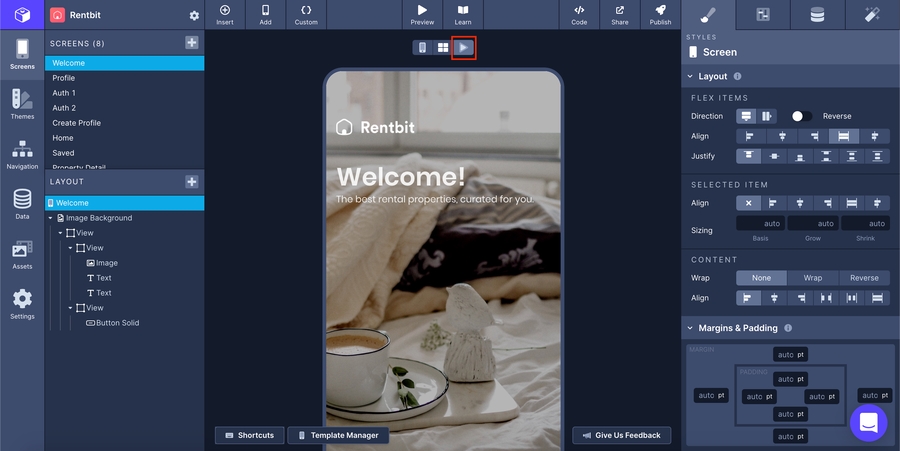
The Builder defaults to the Single Screen View which will display the Screen you have selected in the Screens list on the left-hand side.
To switch to the Multiple Screen View and see all of the screens in your project, click the 4-panel square button above the Web Preview screen.
To switch to the Preview mode which loads the full Live Preview directly in the browser, click the ▶️button
You can open a variety of different menus and share your app with multiple publishing options from the top bar of the Builder.
From left to right:
Insert: Opens the component drawer.
Add: Opens the modal to add a new screen.
Custom: Opens the menu.
Preview: Generates a QR code to be scanned to launch .
Learn: Opens a modal with links to Documentation and .
Code: Opens the View Code modal where you can also your project.
Share: Opens a prompt to generate a for your project.
Publish: Opens a prompt to publish your app as a .
Updated about a month ago